Wednesday, December 28, 2011

Free Earflap Hat Pattern!

Beautiful new hat pattern designed by me!

Yarn: Misti Alpaca Chunky-1 skein
Needles: Size 10


Earflap Hat

You will need: Size 10 16" circular needles & DPNs Blunt eye needle 1 skein Misti Alpaca Two buttons Measurement: 18" circumference Guage:
 Hat (worked in the round):

 Earflaps (worked flat)—make 2:

 Finishing:
Sew buttons on ear flaps. The seed stitch in the hat should be loose enough that you do not need buttonholes. Weave in all ends.

Designed by:
Shaye Nielsen
Fun with Fiber
33338 West Twelve Mile Road, Farmington Hills, MI 48334
248-55-FIBER (3-4237), 248-553-2624 (fax)
www.funwithfiber.com, sales@funwithfiber.com
YARN, ACCESSORIES & CLASSES, Look for us on Facebook & Ravelry

Pick up and knit 13 stitches making sure that your center marking is in the center of your pick up stitches.

Work in seed stitch for 4 rows.

Begin decreases on each side of ear flap as follows:

Decrease row: K2tog, work in pattern until 2 stitches from end, SSK.

Repeat decrease row every other row until 3 stitches remain.

Pull end through remaining stitches and weave in end.
Mark a spot on either side of hat for the center of the earflaps.

Row 1: k1, p1, repeat across
Row 2: p1, k1, repeat across

When piece measures 1.5", begin st st by knitting all stitches every round.

When piece measures 5 ¼" from the beginning, begin decreases as follows:

K8, K2 tog around
K 1 round
K7, K2 tog around
K1 round
K6, K2tog around
K1 round

Continue as established until approx. 8 sts remain. Cut yarn and weave through remaining sts. Pull tight to close.
CO 60 sts. Join in the round and place marker. Work in seed stitch for 1.5" as follows:
3.5 sts=1" in st st

Tuesday, December 13, 2011

Sad

Well..we are just about ready to move downstate next week. A lot of things are packed including both of my sewing machines. (Actually....they already got sent downstate with Matt's family this past weekend). :(:(:(:(:(

What am I supposed to do without my sewing machine?!?!?!?!

At least there is snow outside. Now only if it would snow more so that I can ski one last time before moving...

*sigh*

Sunday, December 11, 2011

Graduation

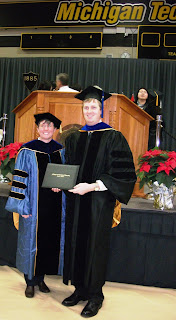
Yay, Matt! Here are some pictures from our graduation weekend.


Some of Matt's family came to visit for the ceremony. Yay! Thank you for coming!!!! :)


Allison and I made a Dalek snowman.

I was exterminated.

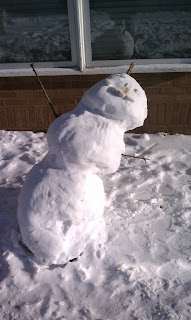
We also made a regular snowman. Isn't he cute???

He was also exterminated.


Sunday, December 4, 2011

Knitted shawl, sewn purse

Sorry..haven't updated in awhile. We've been super busy with the holidays and Matt is graduating this upcoming week.

I haven't been sewing too much lately, although I just got a nice box of fabric in on Friday! Yay!

I did make a shawl in the car ride downstate.


I also made this. It's a purse for my mom..except she wants a leather version. She wanted it smaller than the original pattern, so I was testing it with some extra fabric I had.
It's the Butterick B5505 pattern, but I subtracted approx. 2" on each side. I really like the surprise pocket under the flap, but I do think it needs another pocket. Also, I'm not really sure how functional it will be since the main purse are folds over. I will have to try it out and see.


Wednesday, November 30, 2011

Oh no!

Grandma...I ran out of pie!!!


:(

What do I do?!?!?!?!?!

Hehe

Sunday, November 20, 2011

Leopard Print Skirt

I made a cute skirt! I drafted it myself by using a skirt that I like the shape of. I traced it, added seam allowances, then voila! A beautiful skirt. There is an invisible zipper on the side. It's very soft, 100% cotton and I think flannel. YES! I cannot wait to wear this to work tomorrow. :)


Don't mind the weird rouching...it's because I was standing funny. Hehe

Saturday, November 19, 2011

More Box Bags!

I've made a lot more bags!! These are super easy and fast. AND cute!


Friday, November 18, 2011

Pumpkin pie and sewing goodies!

Matt made me a pumpkin pie with a graham cracker crust for my birthday dessert (per my request) and now it's gone and I'm sad. :(


Also, I made a cute little box bag using THIS tutorial. It's a really great tutorial. Very clear with lots of pictures. I especially like how this one is fully lined and all of the seams are hidden. I'm definitely going to make a lot more of these! I already have 3 more cut, interfaced, and ready to go!


Yesterday, I went to the Portage Quilt House because they are having a huge 50% off sale! Also, I got to use my gift certificate that I got from Judy for my birthday. :):):):):):):):)
They had these adorable hot pads...so I had to get the pattern. Aren't they adorable!?!


Here's the fabric I picked out for them. One for a girl owl and one for a boy. How cuuuuuteee. hehehe Although in hindsight, I'm not really sure why I would make a boy owl..ah well. He will be cute anyway.

And then.....loooooook what I got for myself!!!! Hehehe It's BEAUTIFUL and SOFT! It's 100% cotton, but I think it's a flannel...but you can't tell by looking at it that it's flannel. So, I'm going to make a skirt. I want to get more to make THIS jacket, but I just can't decide if the material would work well for it. That's why I think I will test out the material on a skirt first. :)

Thursday, November 17, 2011

Kay Unger Dress

Yay! I finished my Kay Unger dress! I really really like it a lot. It fits perfectly (well after some small adjustments..) Here are some detail pictures of the rouching, how I fixed the front to fit me bet

Pattern: V1241 Kay Unger, Vogue
Fabric: Charmeuse satin for exterior, China silk polyester for interior, both purchased from http://www.fabric.com/
Size: 12
Adjustments: I shortened the shoulders by approx 1". Also, I folded the front section over because it was sticking out too far from my body. It looked fine from the front, but from the side view it looked very strange. I also sewed up the crossover in the front so it wouldn't gape open. Everything else fits perfectly.


Here's a close up of the front rouching: 


Left: How I folded over the front section   Right: The bottom hem in the back


Here are the bottom pictures and the hook & eye (obviously I still can't quite figure out how to do this properly...I don't know what I'm doing wrong.)


And for the modeling picutres:


Sorry, I know...picture over load!! Hehehe. Anyways, I'm very happy with this dress.